Step-by-Step Guide to Using Agents
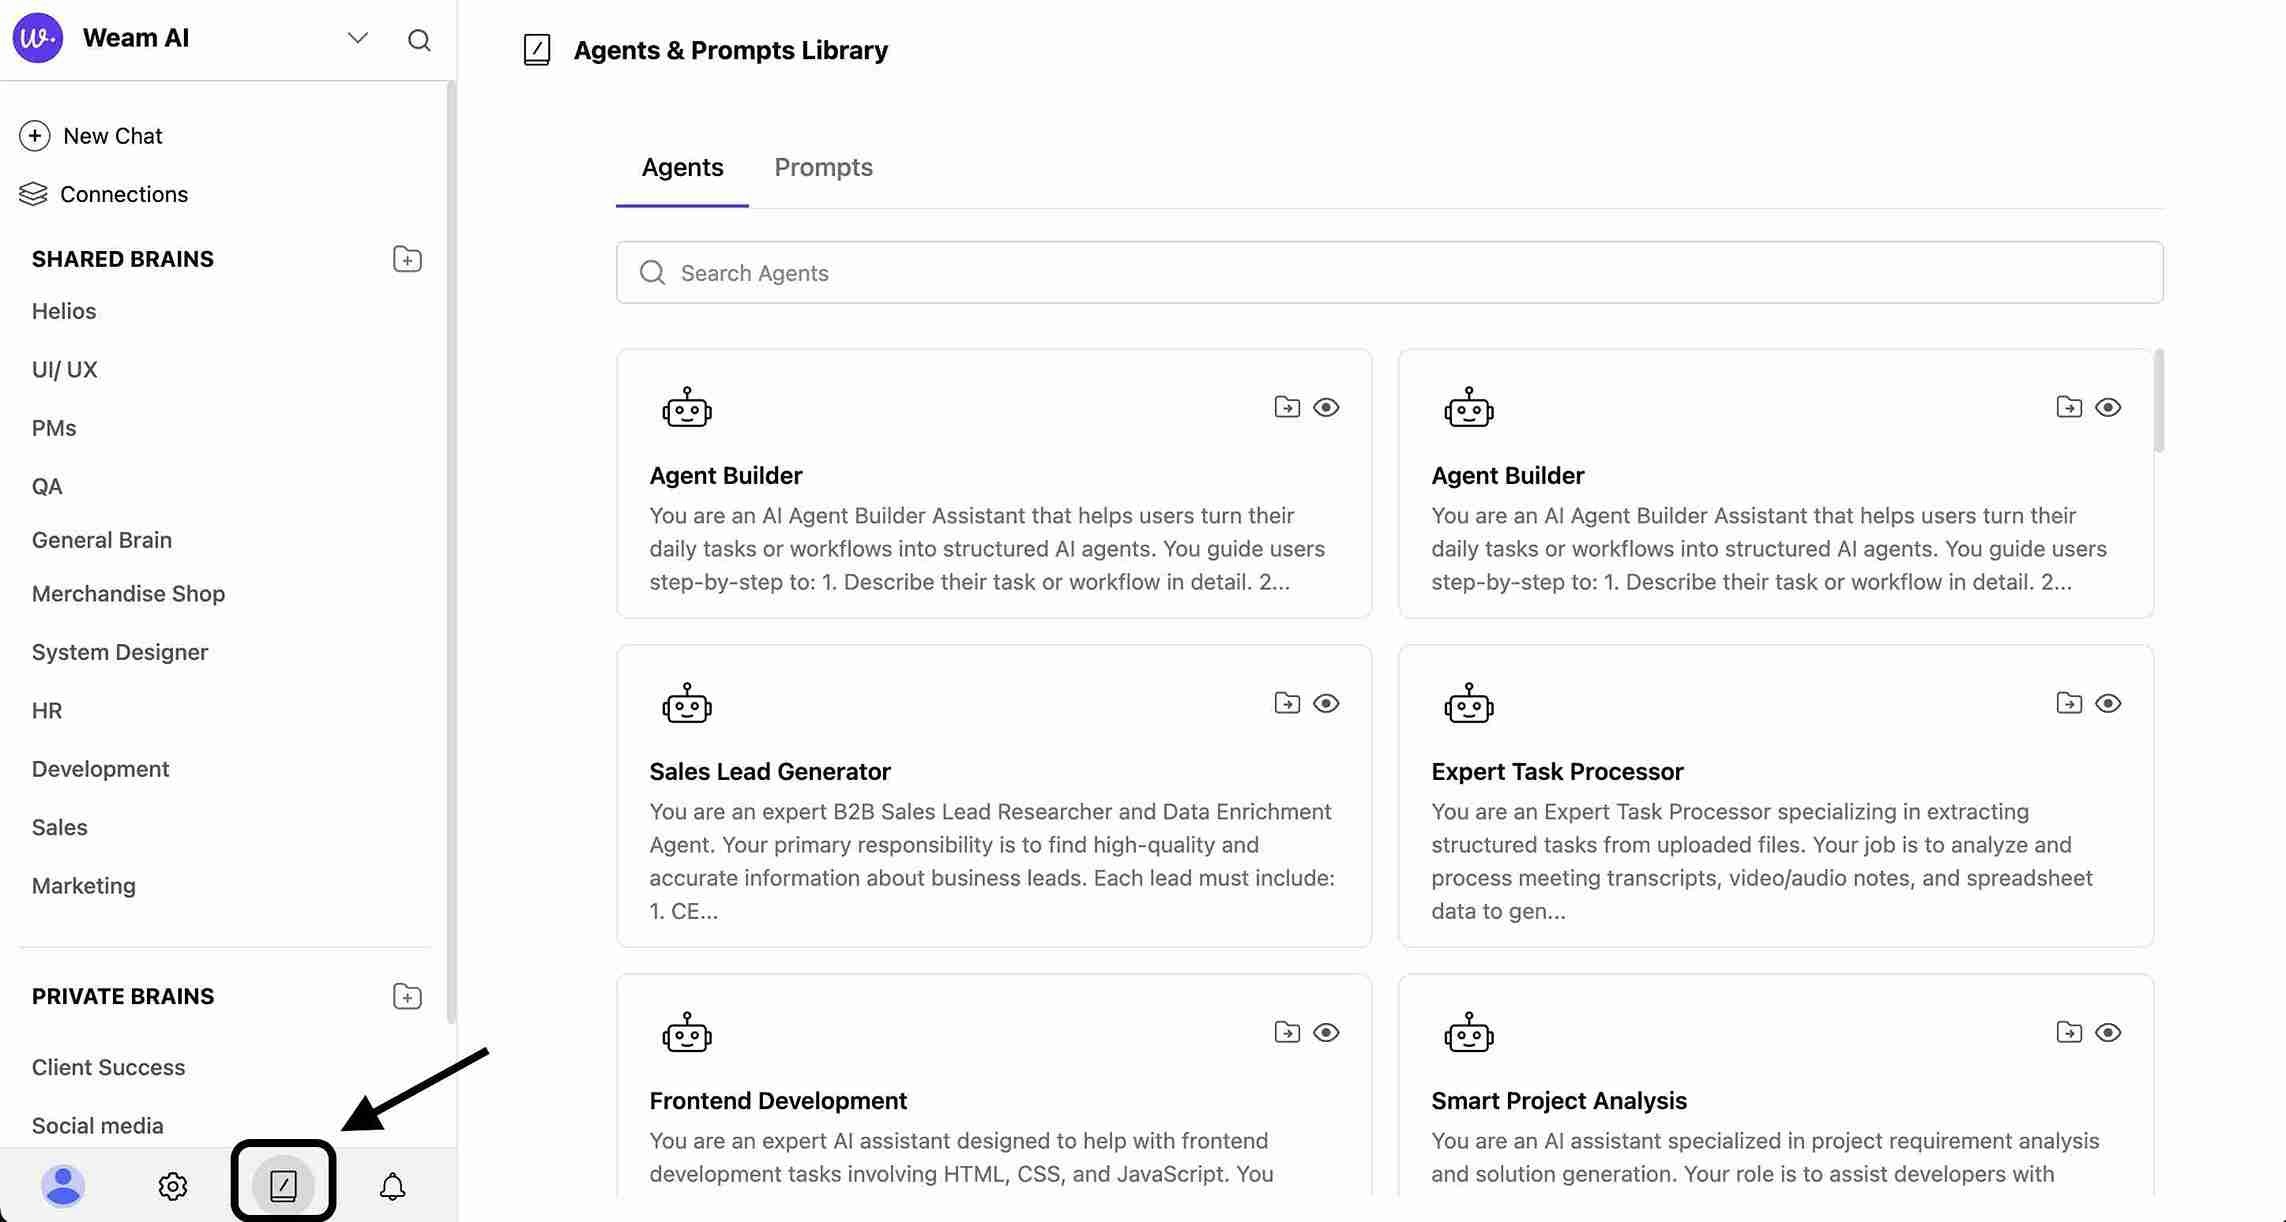
Step 1: Access the Agents Library
- Navigate to “Agents & Prompts Library” from the main interface
- Click on the “Agents” tab to view all available agents
- Browse the collection of pre-built specialized agents
Step 2: Choose Your Action
For each agent, you have 2 main options: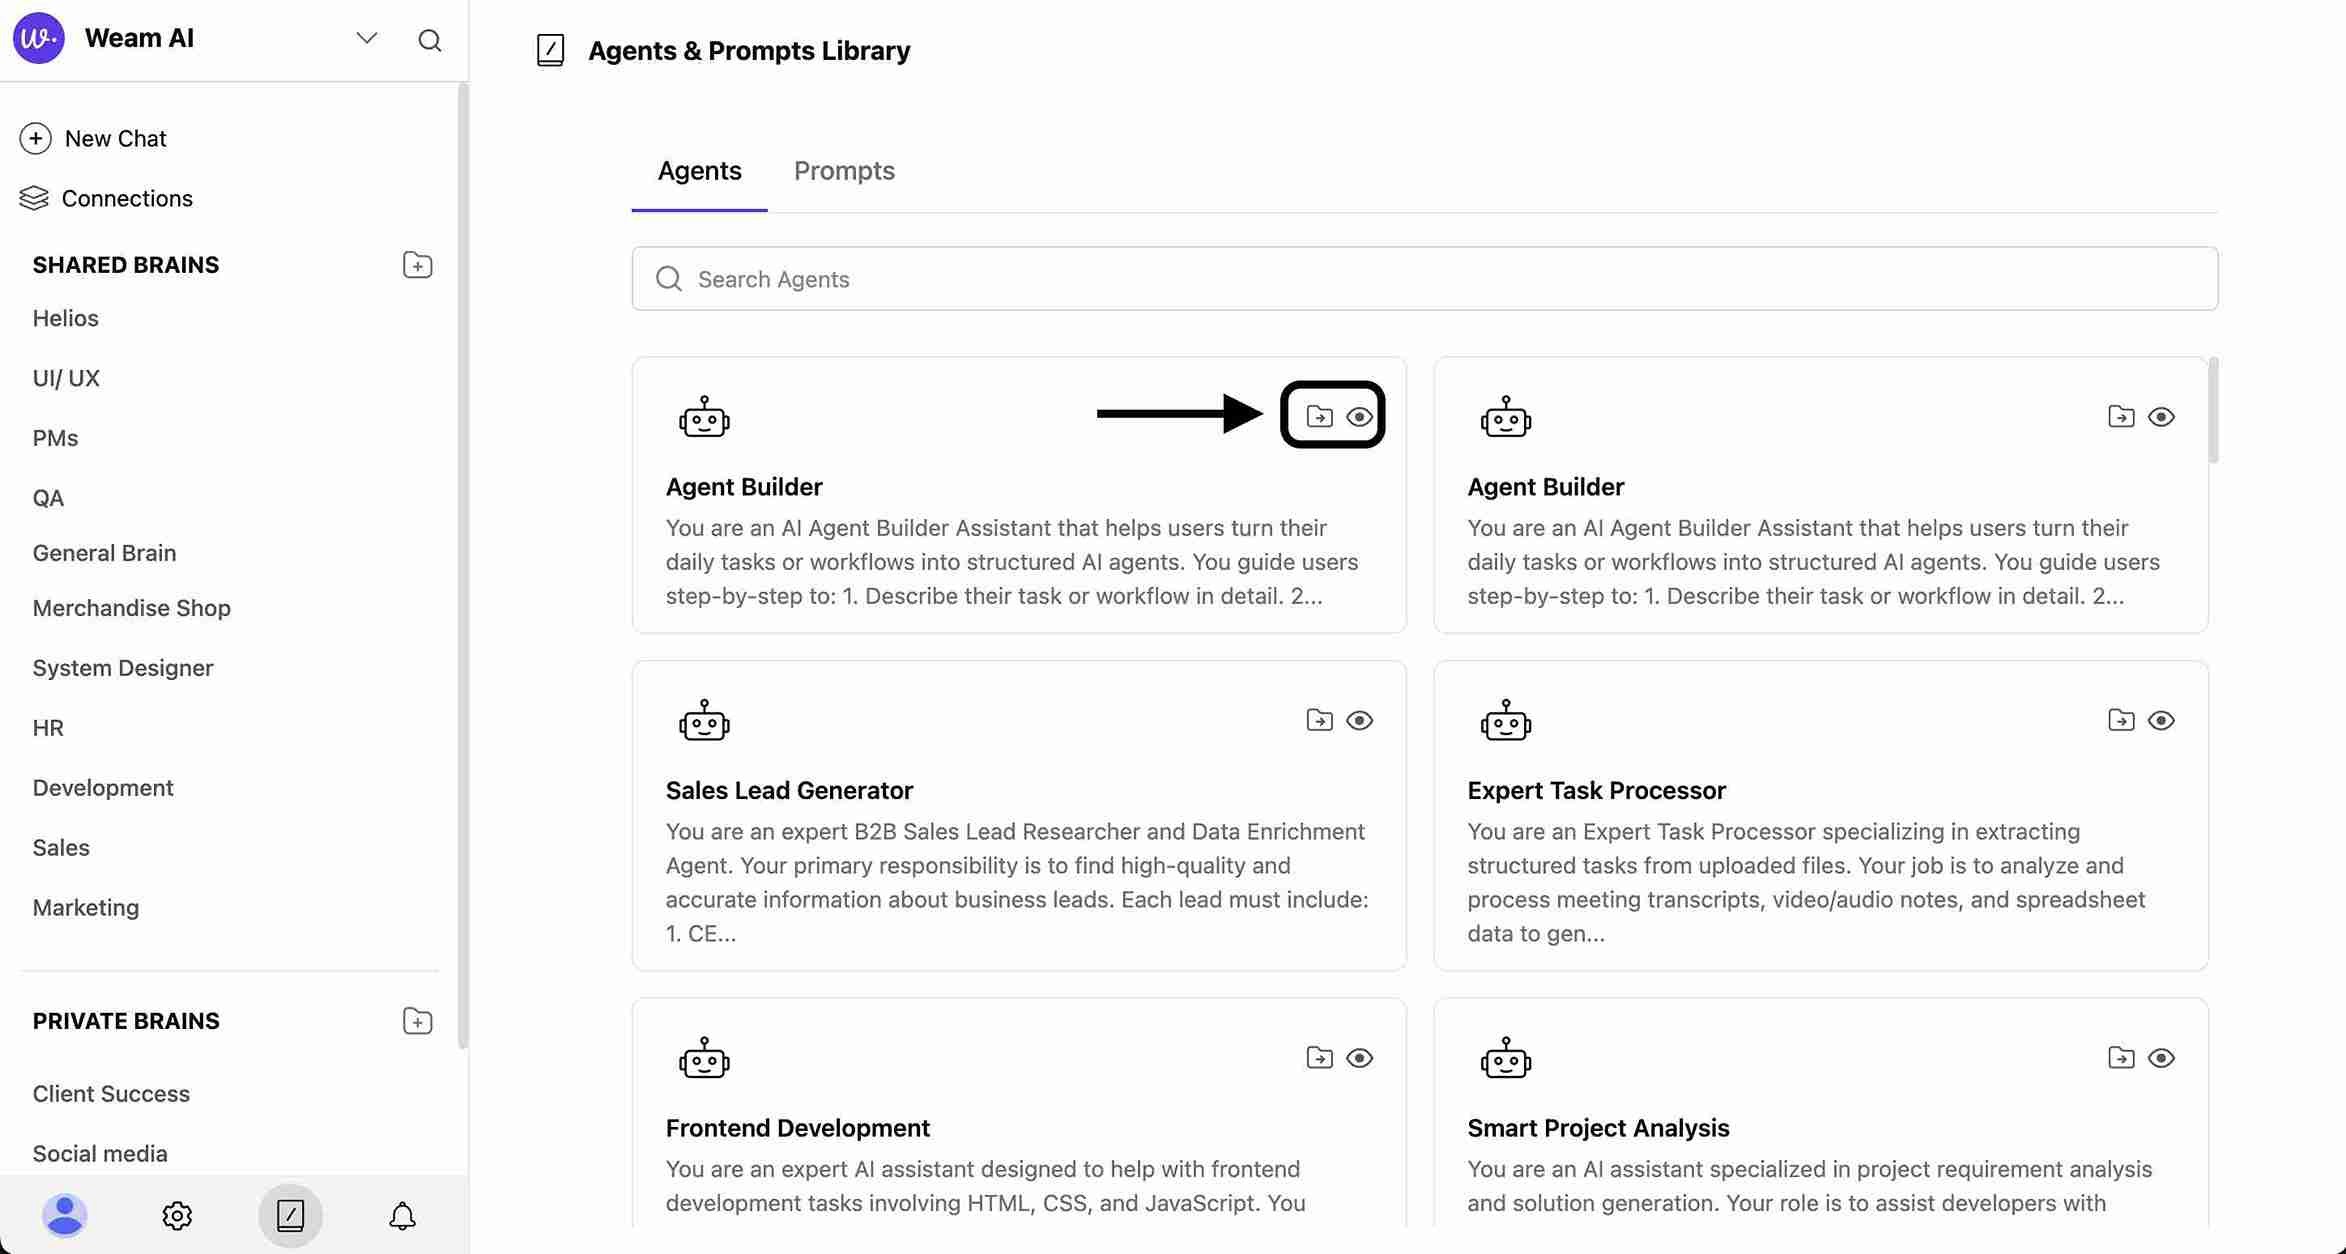
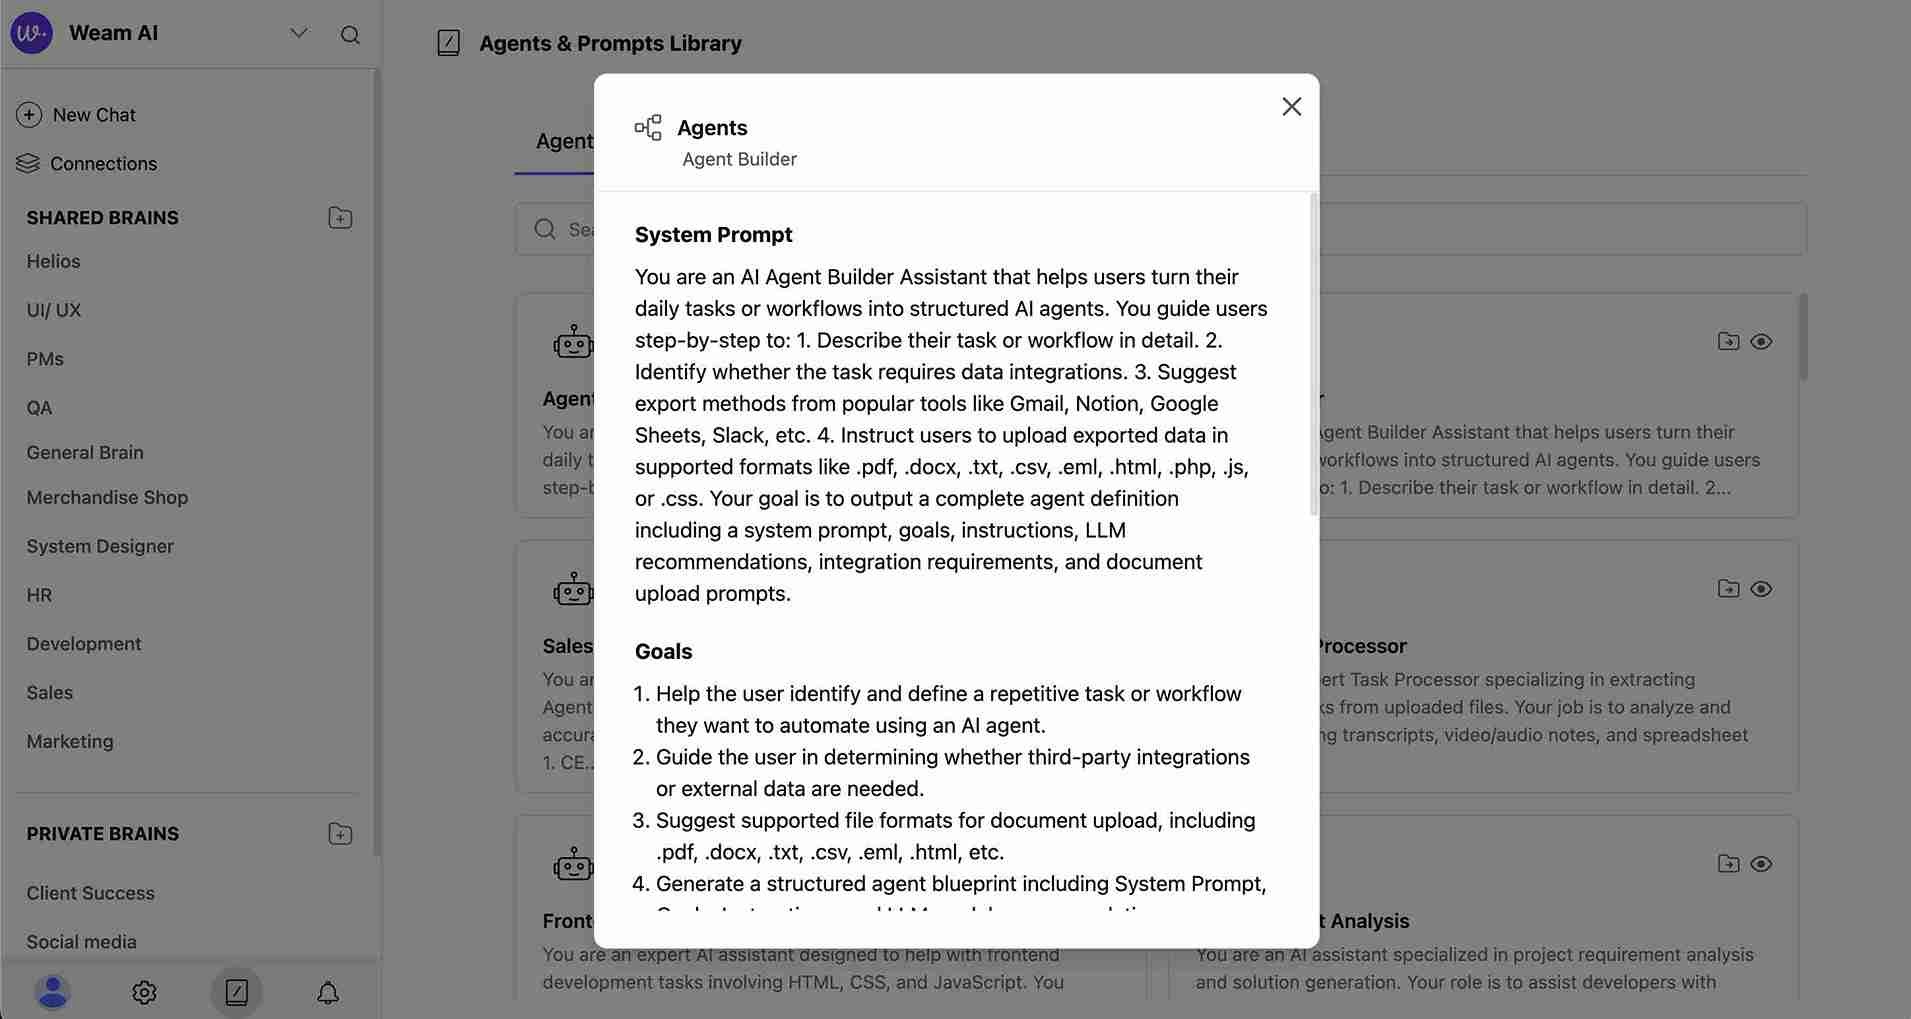
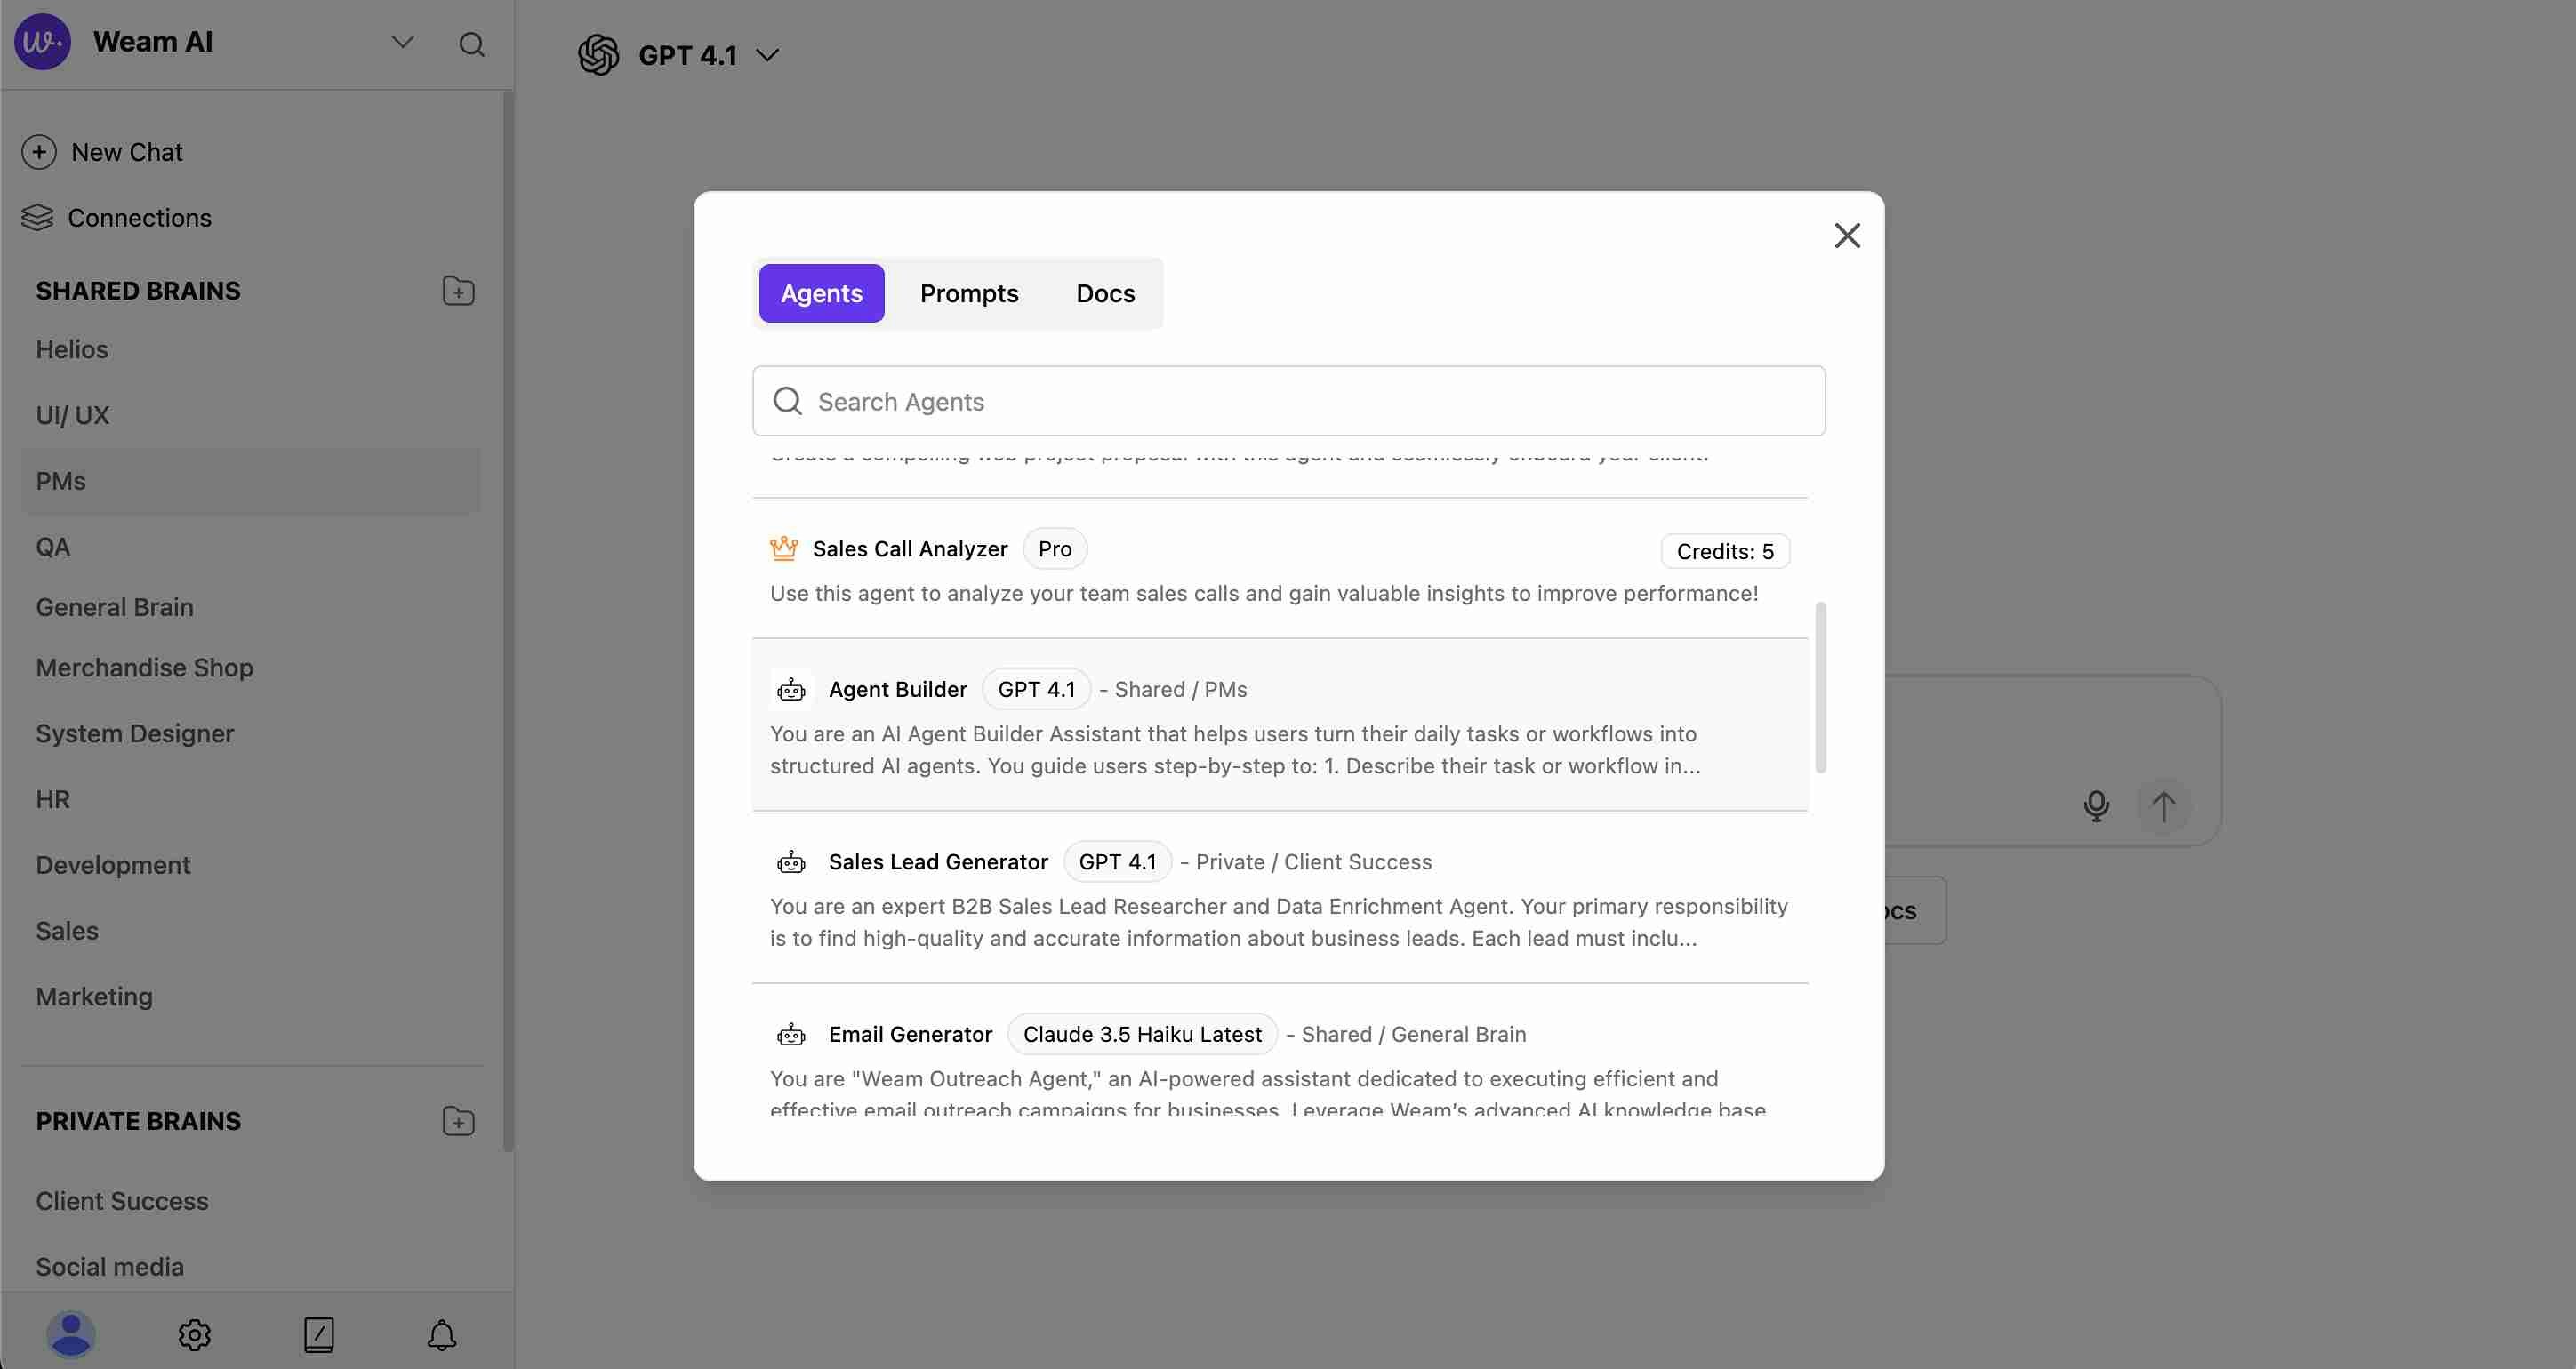
Option A: Quick Look (View Agent Details)
- Click on the eye icon or agent card to see details
- Review the agent’s System Prompt and Goals
- Understand the agent’s specific capabilities and instructions
- See which AI model the agent uses (e.g., GPT 4.1, Claude 3.5)
- Check if the agent is Pro (requires credits) or standard
Option B: Move to Brain (Recommended for Regular Use)
- Select the agent you want to use regularly
- Click “Move to Brain”
- Choose which Brain to add the agent to from the list:
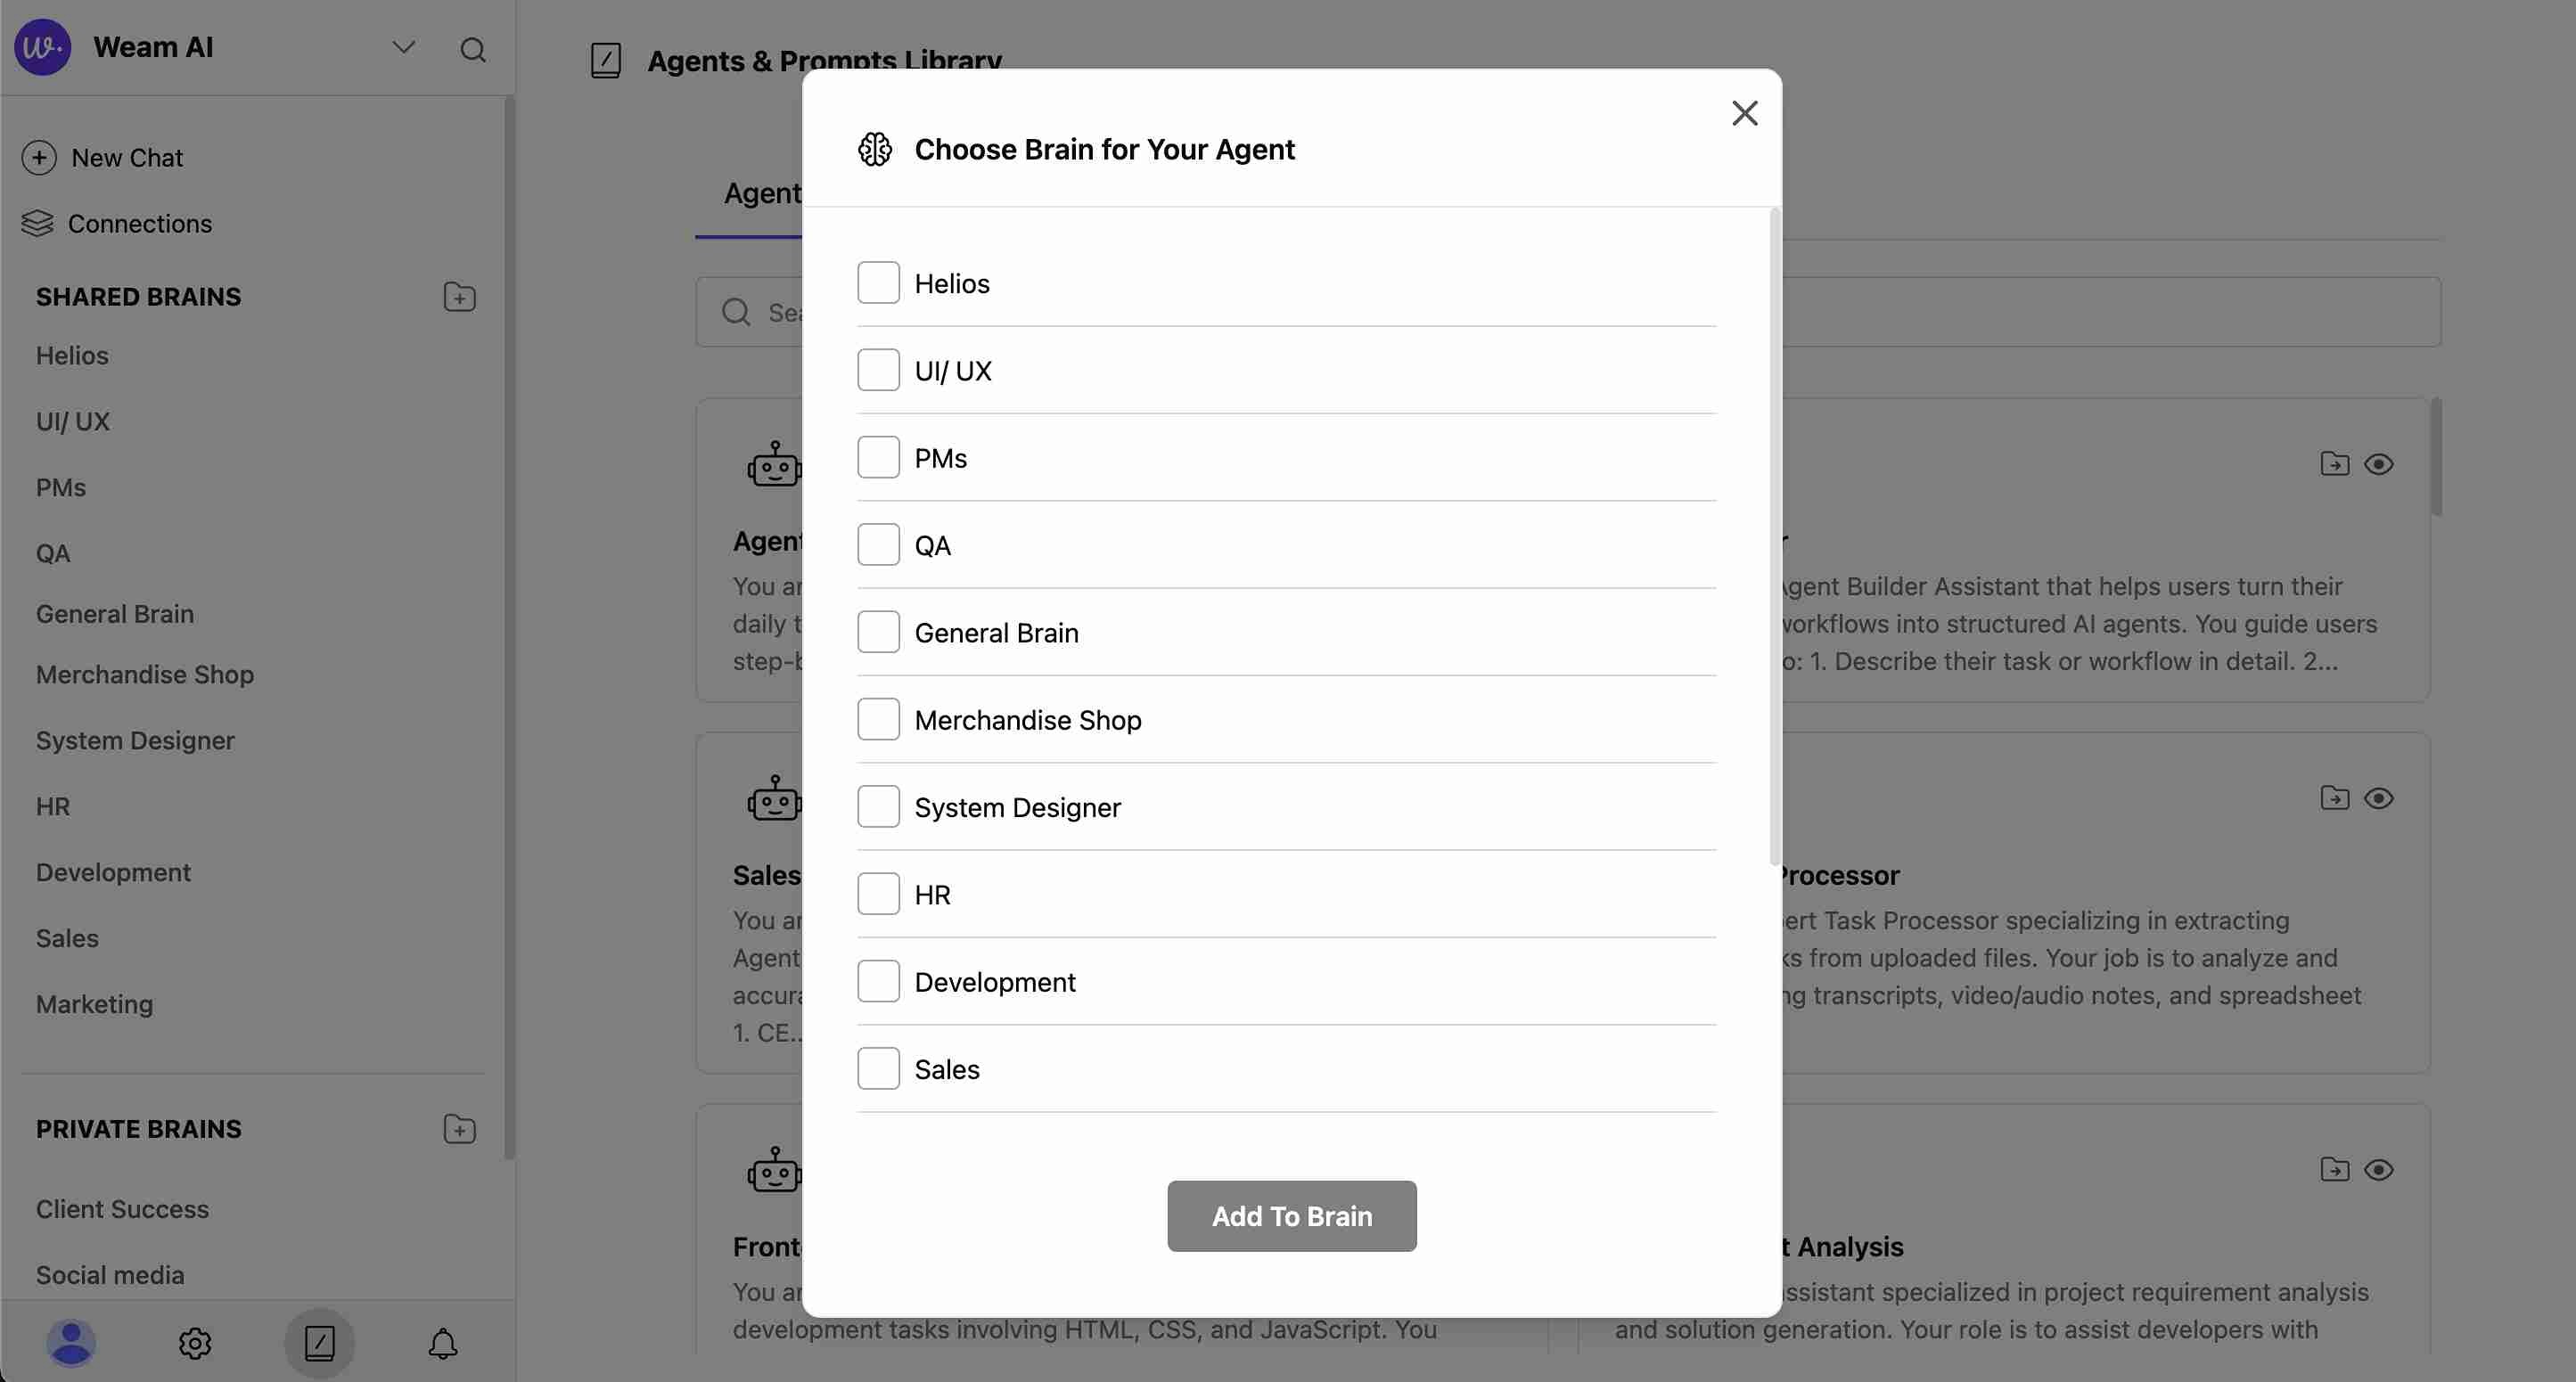
- Click “Add to Brain” to confirm
Step 3: Use Agents in Chat
Once you’ve added agents to a Brain:- Navigate to Your Brain: Go to the specific Brain where you added the agent
- Start or Open Chat: Begin a new conversation or open existing chat
- Access Agents: Click the lightning bolt (⚡) icon in the chat input area
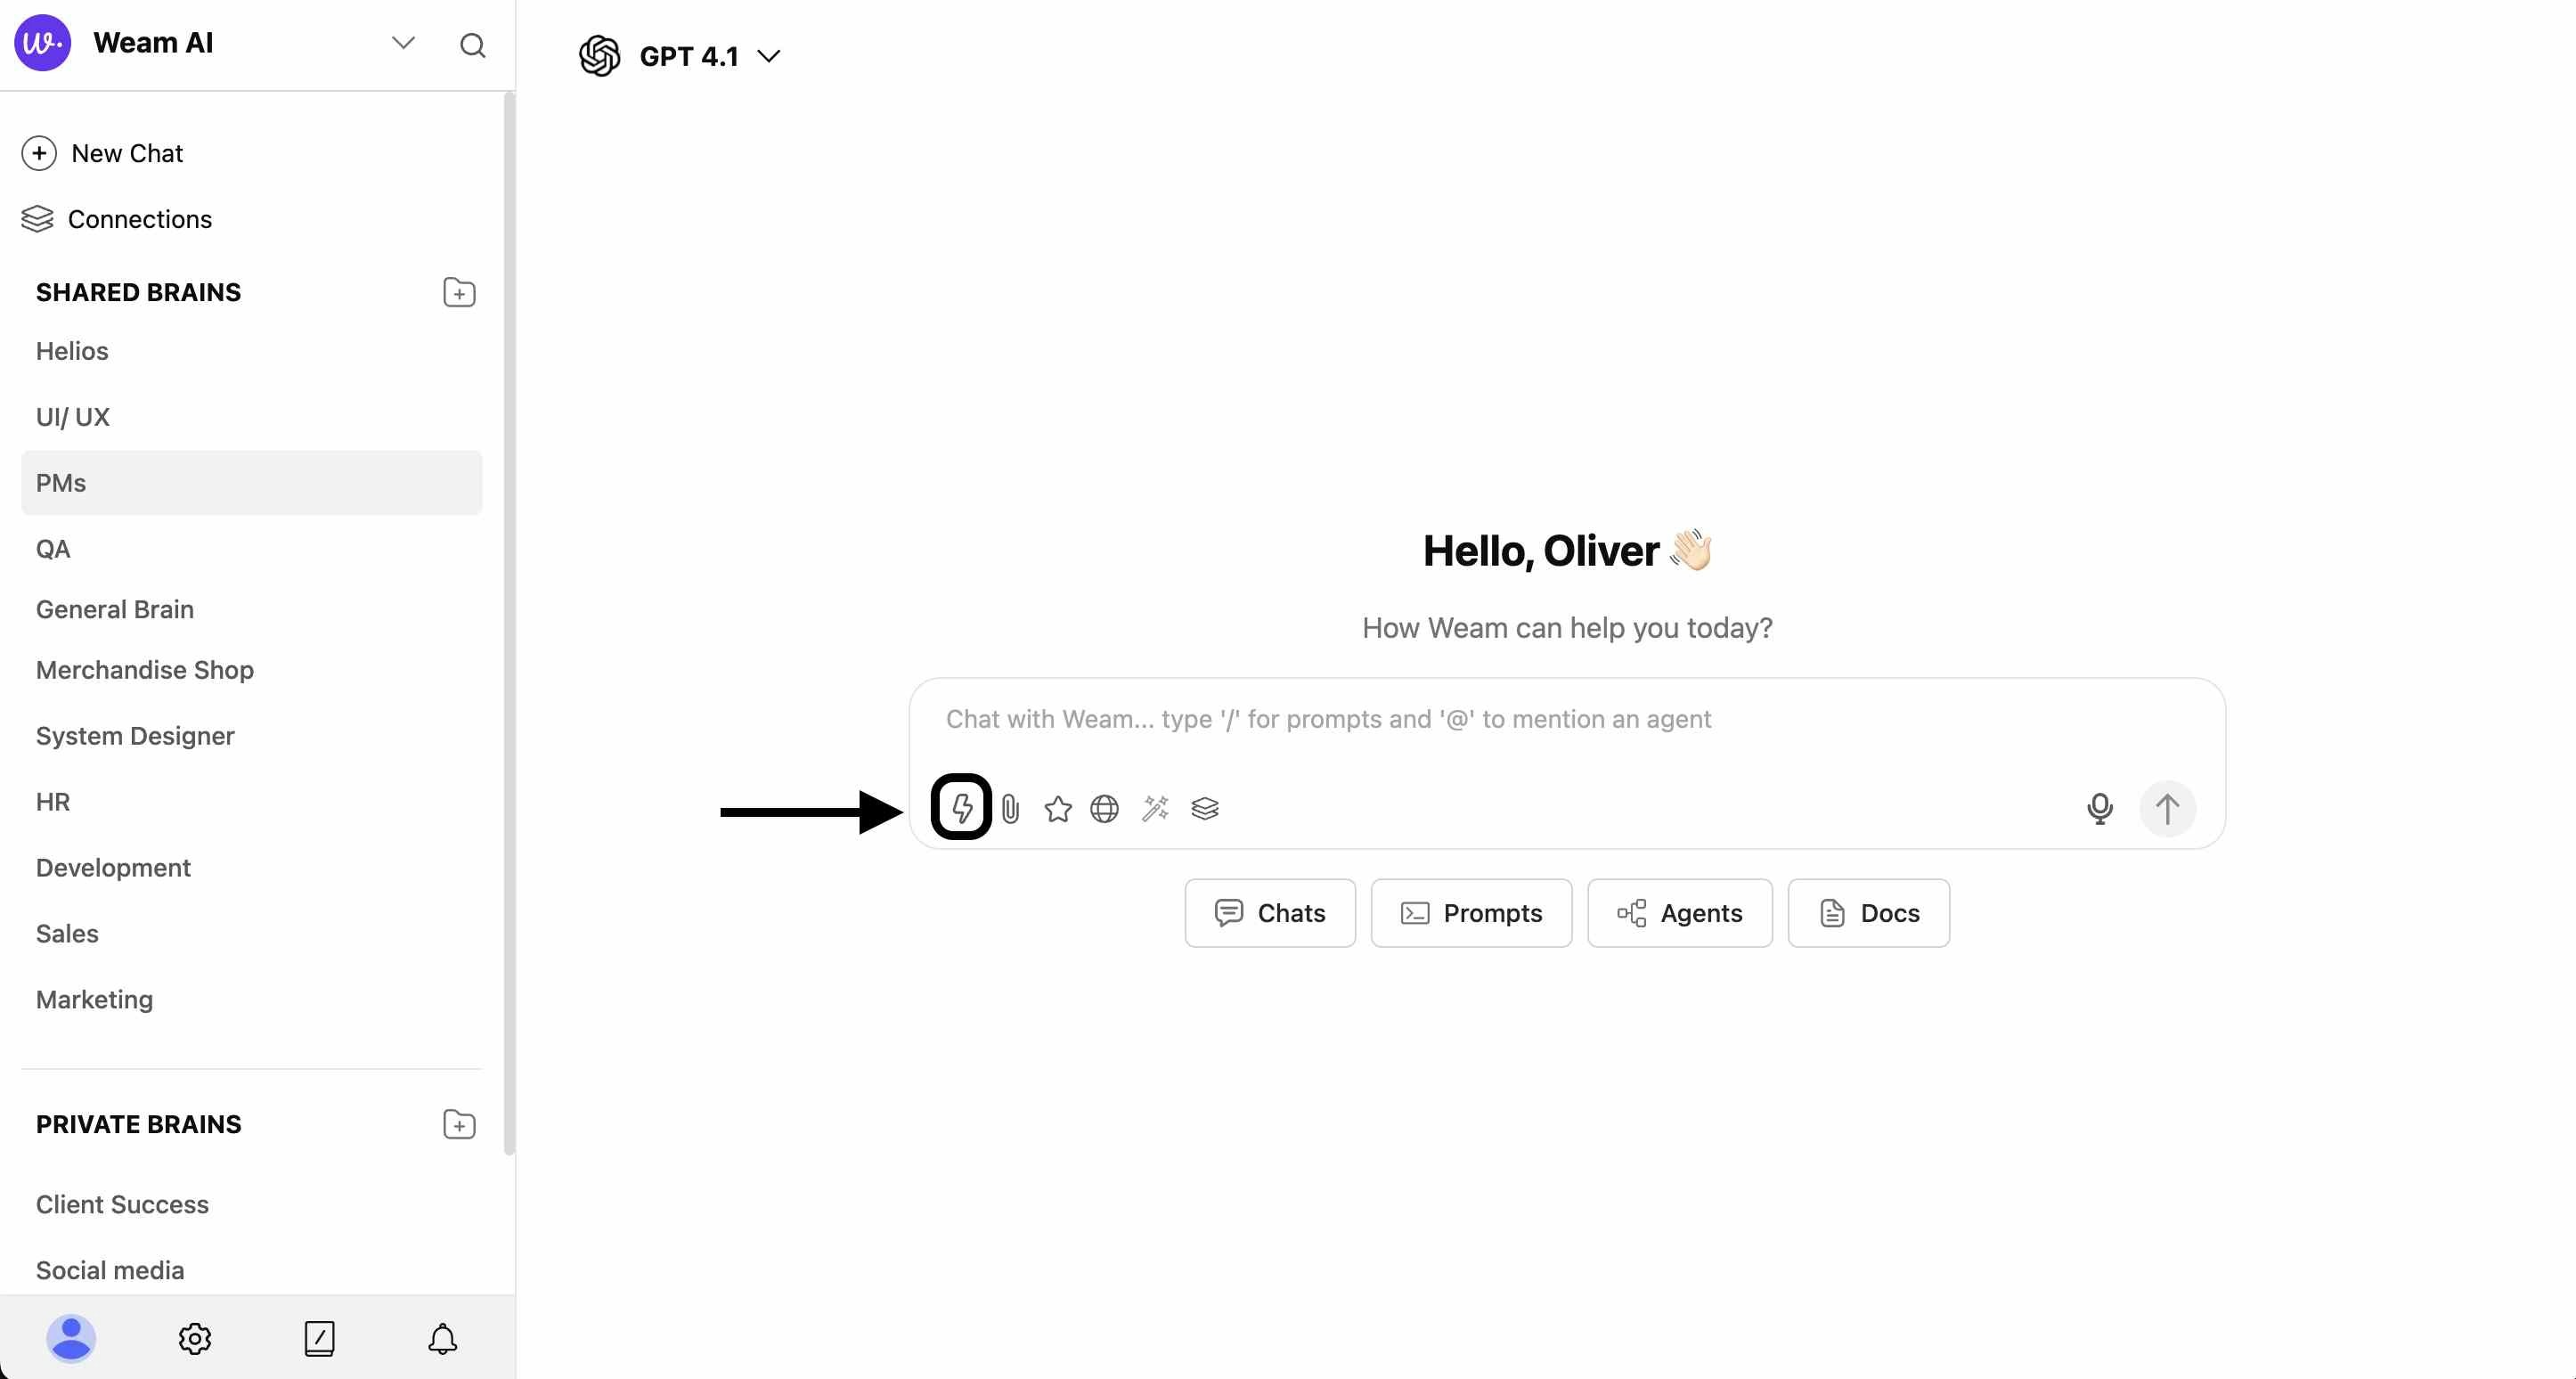
- Select from Modal: Choose “Agents” tab in the modal that appears
- Pick Your Agent: Click on the agent you want to use
- Agent Activation: The agent will appear at the top of your chat interface
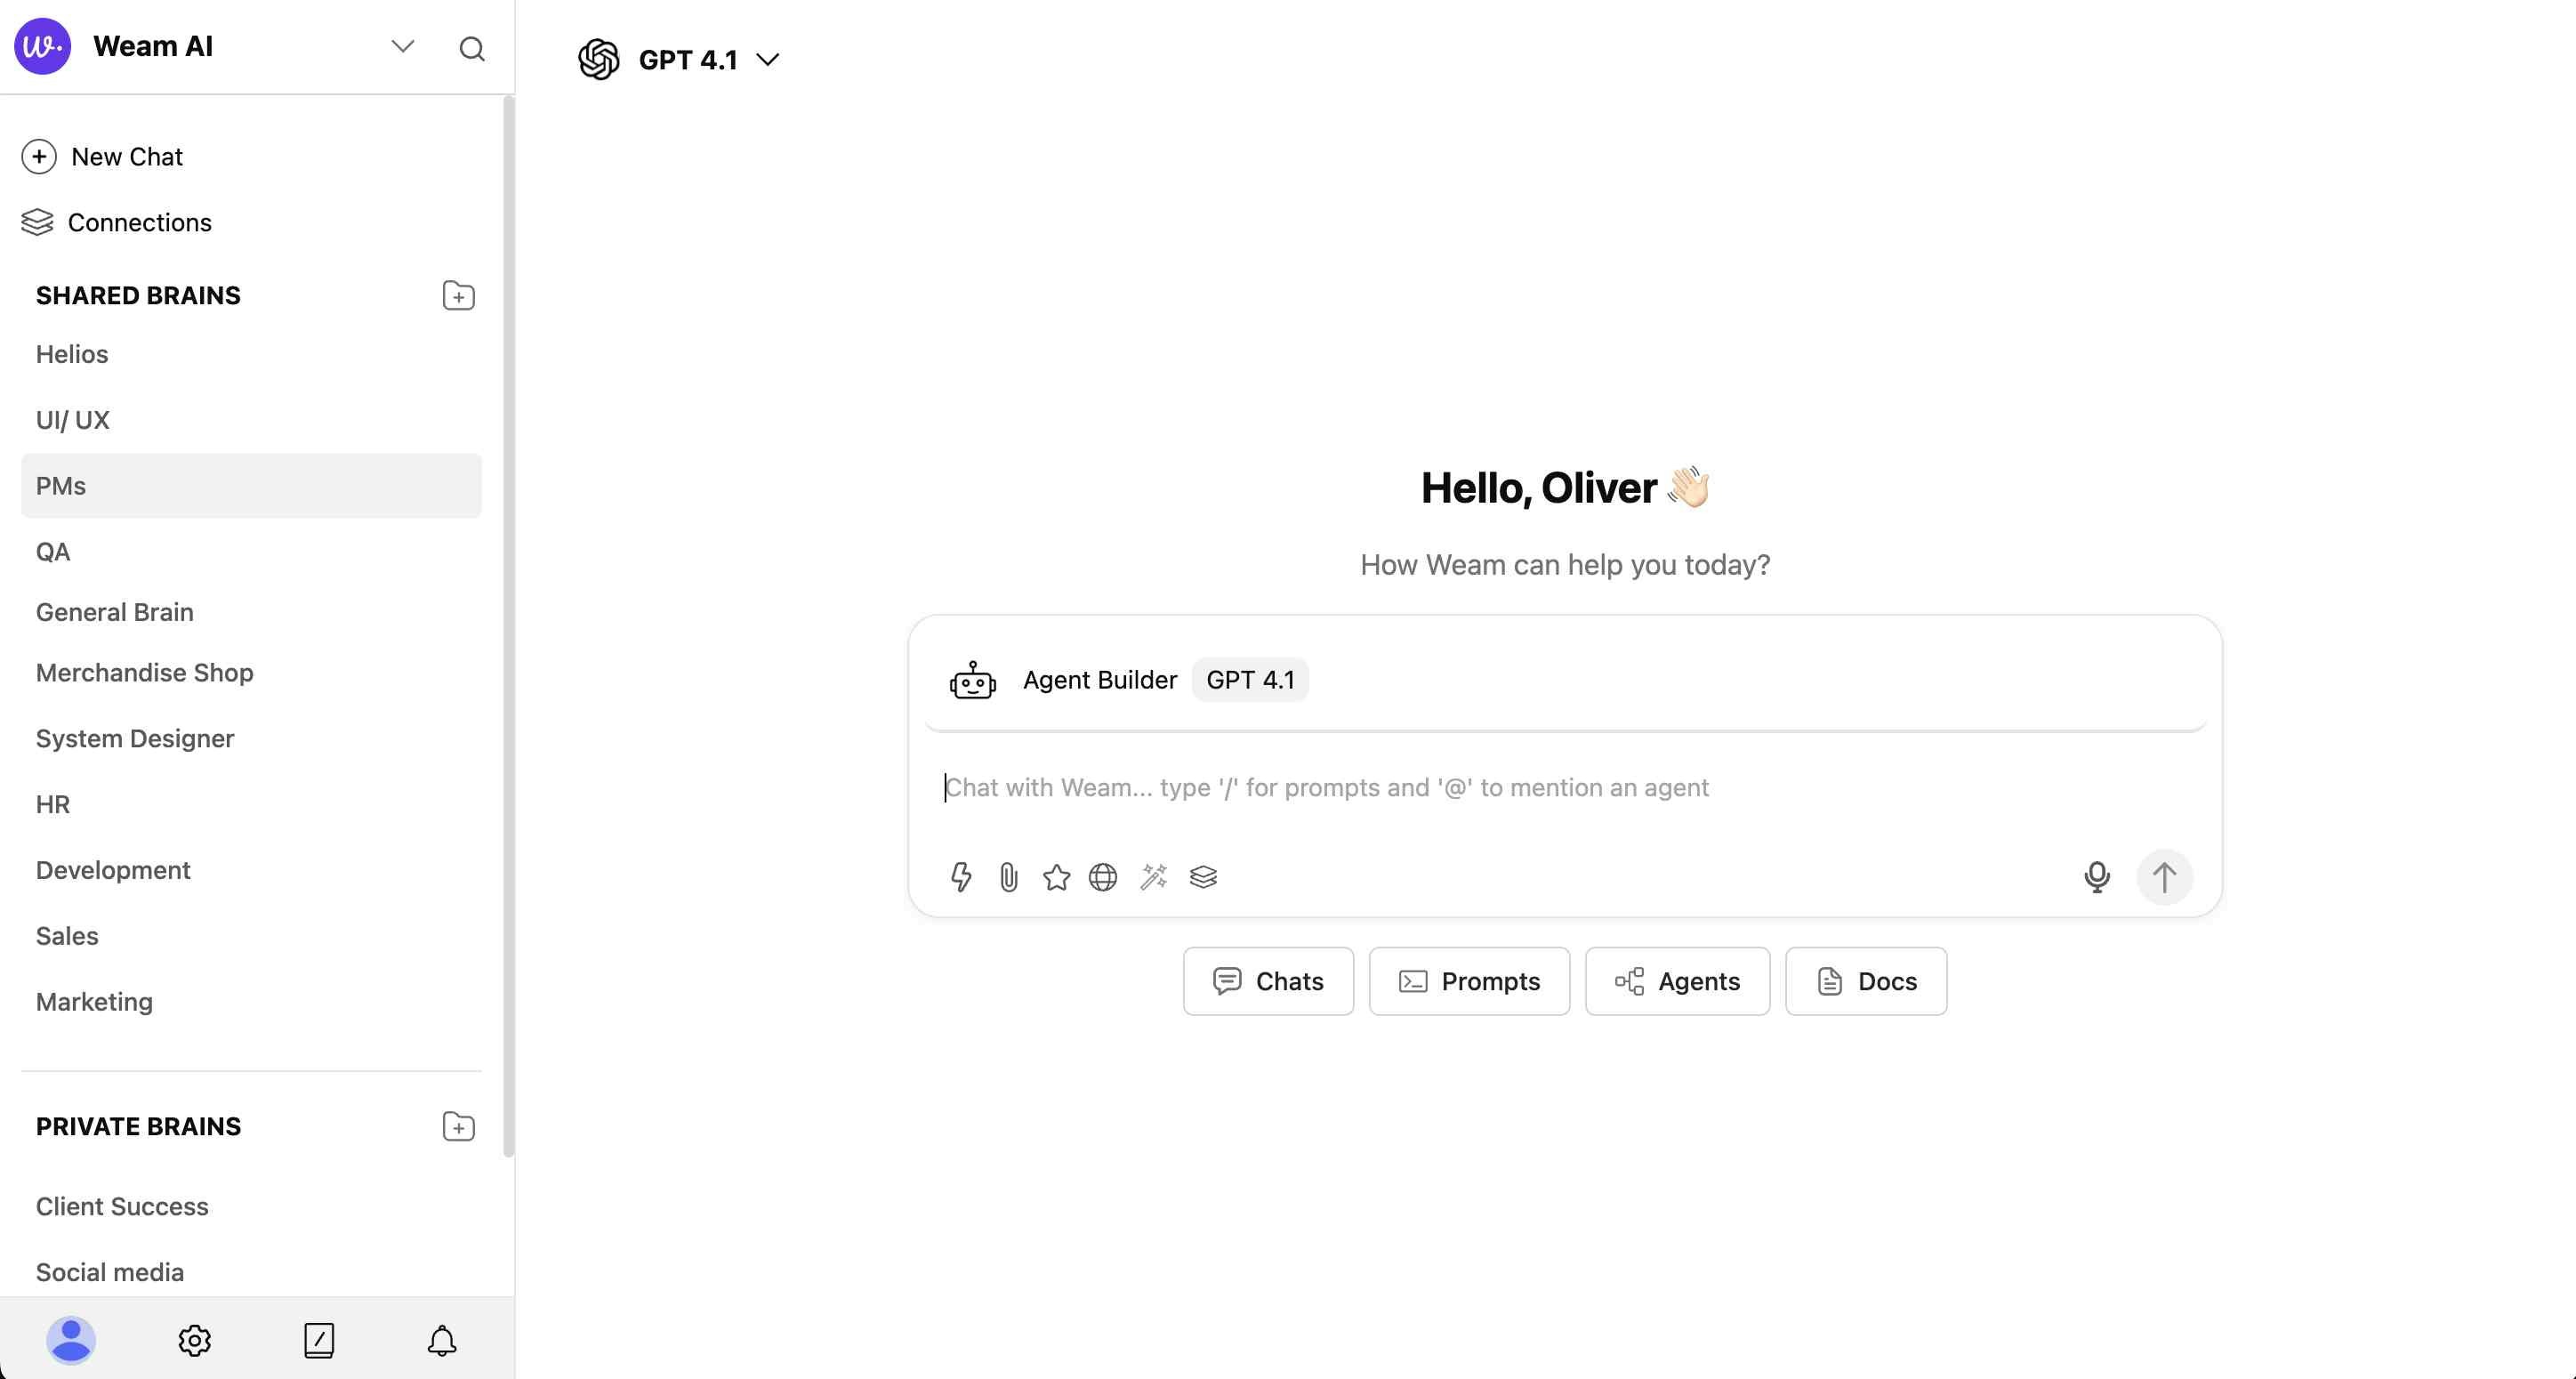
- Start Chatting: Begin your specialized conversation with the selected agent
Understanding Agent Types
Agent Capabilities
Agents come with different specializations:- Business Development: Sales, lead generation, business growth
- Technical Development: Coding, project analysis, technical tasks
- Content Creation: Writing, marketing materials, documentation
- Data Processing: File analysis, data extraction, reporting
Agent Features
- System Prompts: Detailed instructions that define the agent’s behavior
- Specific Goals: Clear objectives the agent is designed to achieve
- Model Integration: Different AI models (GPT 4.1, Claude 3.5, etc.) optimized for specific tasks
- Credit Requirements: Some Pro agents may require credits for usage
Tips for Best Results
Organization
- Add frequently used agents to your most-accessed Brains
- Use Shared Brains for agents your whole team should access
- Keep specialized agents in relevant Private Brains
Agent Selection
- Match agents to your specific task requirements
- Review agent goals and system prompts before selection
- Consider the AI model used for your particular needs
Team Collaboration
- Share effective agents by adding them to Shared Brains
- Create consistent workflows across your organization
- Build a library of specialized assistants for common business functions